By Louis Kleynhans
The one thing I knew when I decided to start with this blog that I want to give you advice on how to take better photos. Now, I could kill you with a lot of technical Mambo-Jambo and tell you to buy the best camera, etc. But, this is not going to make you a better photographer. The first decision that you have to make is: what are you going to use these images for? The quality doesn’t have to be the best if you would simply like to share the images on social networks. Then, quality is everything if you take your photography more seriously. I’m also not a big advocate of using Photoshop to improve your images. I strongly feel that if you did it right when you took the shot, you will need only basic corrections, and there are so many apps and free software that you could use for that. There are also a few small things that you can change to your equipment to improve your photos a lot:
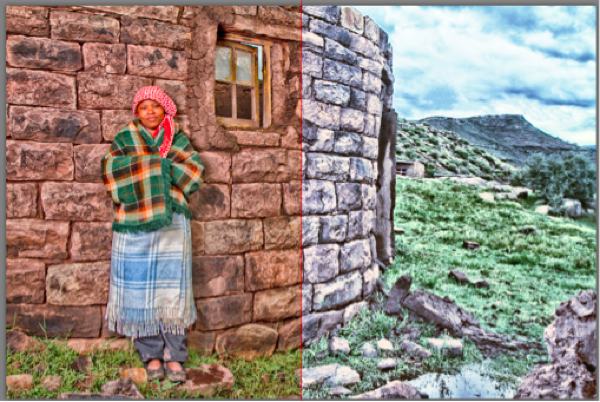
Find the right light: This is most probably the best advice I can give you. Early morning and late afternoons are the best to take photos in. The problem is that you have to get up early in the morning and you can only drink that sundowner once the sun has set. The quality of light that you get in these times can’t be compared to any other light. For most of the day the sun is very harsh, which will give you flat colours. With portraits you will have horrible shadows in you images under the eyes and the nose. If you take photos during what is called “The Golden Hour” you will immediately get rid of those nasty shadows and you will get a nice soft warm light in your photos. In the image above you can see the difference between good light and bad mid-day light. This is a easy thing to change
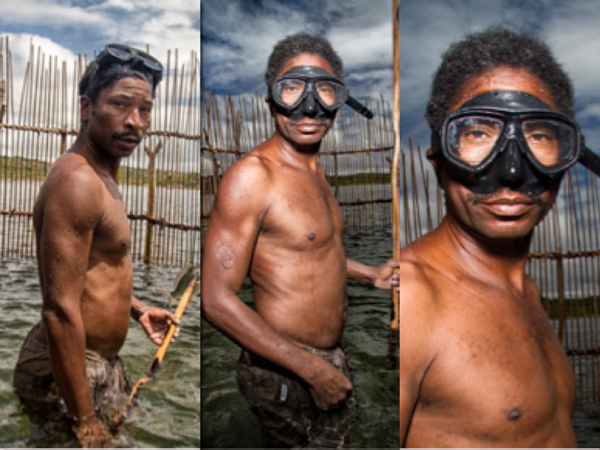
Get closer: Don’t be afraid to get closer. You may find a whole new perspective on your subject when you do this. It also gives you the advantage of changing your angles. I know it can be intimidating if you get in close with your camera, but don’t be afraid and you will be pleasantly surprised. In the image of the fisherman above you can see how I moved in while I was taking the series of images. You will notice that the second and third image is just so much stronger than the first image
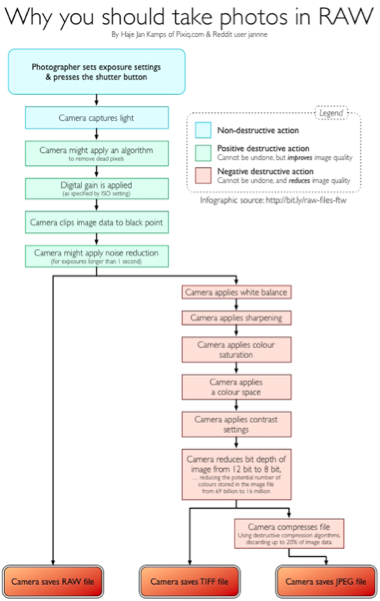
RAW: You have no choice if you want quality in your photography, Jpeg is a limited file format. In Jpeg you lock in one set of settings into your photo, similar to old film. In RAW, you have the same image, just with at least six different settings . I know a lot of you are immediately saying RAW images are big – yes they are, even if you use small-RAW. But a bigger memory card is not a big price to pay for the huge difference in image quality. Take a look at the diagram in the scroller above for more information.