4×4 Accessories THE HI-LIFT JACK
A hi-lift jack is an immensely useful off-road accessory provided, of course, that you know how to use it properly. We spoke to Gary Swemmer from LA Sport Pretoria East about the “dos and don’ts” of using a hi-lift jack
Text and photography: GG van Rooyen
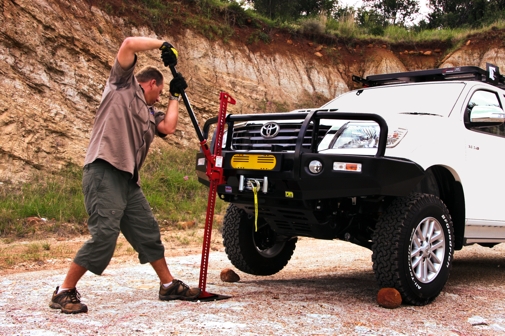
If you don’t know what you’re doing, using a hi-lift jack can be quite dangerous. In fact, the handle alone could easily break an arm or a jaw if not handled correctly. You could also damage your vehicle pretty badly. This is why it is important to make sure that you know how to use it safely and effectively. Here is Gary Swemmer’s step-by-step guide to using a hi-lift jack.
JACKING UP YOUR 4×4
1. Put on gloves. Keep a good set of gloves in your vehicle and always wear them when using recovery equipment. It might seem unnecessary at times, but it could really save your hands.
2. If possible, try to jack your vehicle up on a flat surface. Using a hi-lift jack on a flat surface is much easier.
3. Make sure that your vehicle won’t roll forwards or backwards while you’re jacking. Gary suggests putting your vehicle in low range first gear, and pulling up the handbrake. Also secure your tyres with the rocks or wheel chocks.
4. Place a large off-road base on the ground underneath the jacking point you’re going to use. This is especially important when using the jack on a loose surface such as sand.
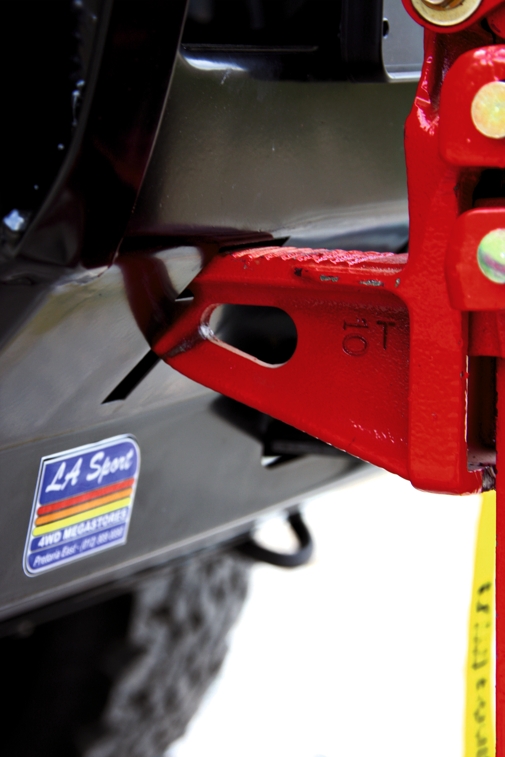
5. Place the bottom of your jack in the base and the large runner inside your bumper’s jacking point. Some replacement bull bars have a T-shaped jacking point that can accommodate the hi-lift jack’s large runner. Others have round jacking points. If your bumper has a round point, you’ll need a jack adapter that allows you to use this sort of point.
6. Make sure that the reversing latch is pushed into the “up” position.
7. Start jacking. Always keep both hands on the jack’s handle. Pull the handle all the way to the bottom, and then return it to the top position. Do this until the wheel has been jacked up off the ground. If you find that your vehicle is starting to move forwards or backwards while you are jacking, or if your jack starts to lean to one side, lower your 4×4 immediately and start over. If you keep going, you could damage your vehicle or injure yourself.
8. Once it’s done, make sure that the handle is securely clipped to the steel bar.
9. Change the tyre.
LOWERING YOUR 4×4
1. Make sure that the handle is in the upright position and clipped to the steel bar before you start lowering your vehicle.
2. Push the reversing latch all the way down.
3. Start jacking. Use both hands and use the jack exactly as you did when jacking the vehicle up. The vehicle will slowly be lowered on every up stroke. Keep a very firm grip on the handle, since the pressure will cause it to shoot up if it slips out of your hands. Be very careful, as the handle can cause serious damage if it connects with a body part.
4. Once the wheel is back on the ground, you can stow away all your equipment. Remember to remove the rocks or wheel chocks before attempting to drive away!
BUYING A HI-LIFT JACK
If you want to use a hi-lift jack, you’ll need to ensure that your 4×4 has the necessary jacking points. Replacement bull bars and bumpers tend to have these points, but if you don’t want to replace your bumpers, don’t worry, there is another solution. It is possible to have hi-lift points attached directly to your vehicle.
When buying a jack, keep your vehicle’s ground clearance and wheel articulation in mind. You have to ensure that the jack you buy is capable of jacking your vehicle high enough for the wheel to lift off the ground!
LA Sport offers two versions. There is a 1,2m model that retails at R995, and a 1,5m version that retails at R1140.
MUST-HAVE ACCESSORIES
Gloves: Always wear a pair of gloves when using recovery tools such as hi-lift jacks, winches and spades.
Hi-lift jack base: Some surfaces, such as sand, can make using a hi-lift jack quite tricky. The best solution is to use a base that distributes the weight placed on the jack over a wider area. The base retails at R185.
Hi-lift jack isolator: A hi-lift jack’s handle can make an annoying rattling sound when you’re driving. A jack isolator holds the handle in place and prevents this from happening. When using the jack, the isolator also does a better job of securing the handle at the top of the steel bar. The isolator retails at R90.
Hi-lift jack adapter: As you’ve probably noticed, a lot of replacement bumpers and bull bars have rounded hi-lift jacking points. If you want to use these points, you’ll need to buy an adapter that fits onto the jack’s large runner. Two versions are available: a 250mm one that retails at R225, and a 500mm one that retails at R295. Why buy the longer one? Well, jerry cans and spare wheels can often make jacking points tough to reach. A longer extension makes your jacking points easier to use.
STOWING YOUR JACK
A lot of people stow their hi-lift jacks on their roof racks. This isn’t a bad idea, since it makes the jack easy to reach when you need it. The downside, however, is that it adds weight to the top of your vehicle, which can potentially increase body-roll. Roof rack fittings are available for your jack.
Another popular spot for the hi-lift jack is on the front or rear bumper (especially on Land Rover Defenders). This is great, since it keeps the added weight closer to the ground, but it also means that the jack is more exposed to dirt and mud.
It is obviously best to keep your jack in a place where it is protected from the elements, but since it is big and bulky, there is often little option but to install it on the outside of your vehicle. For most people, placing the jack on a roof rack will probably make the most sense.
TAKING CARE OF YOUR JACK
Don’t use oil or Q20 on your jack, since this will attract dust. It is best to simply clean it with water.
If you want to provide some protection from the elements, buy a jack cover.
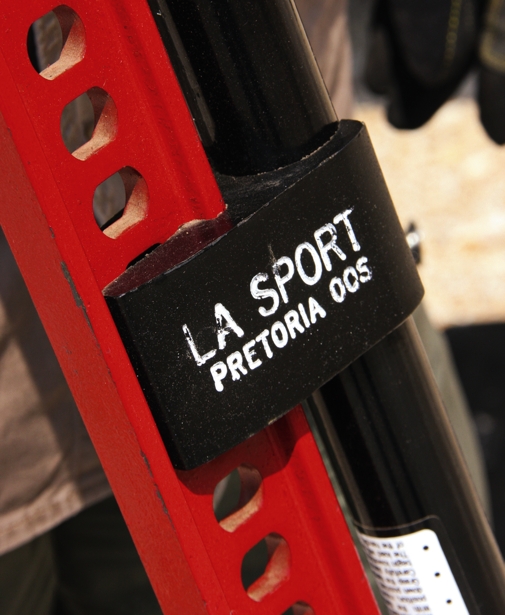
For more information on hi-lift jacks and accessories, contact Gary and his team on 012 809-0090.
Gary’s LA Sport Pretoria East store recently moved to Hazeldene Shopping Centre, on the corner of Lynnwood & Silverlakes Drive.
Coordinates: 25°47’05.55″S; 28°21’16.77″E